Tag Archives: DIY

Items In Your Pantry That Are Must Haves For Your Skin…

29 Jun

imageI know it can be an inconvenience to try and make skin and bath items yourself. Drug stores, organic body retail stores and high end department stores are all trying to get your business with up and coming anti aging products and ingredients. Some people insist they are the golden ticket. The magic potion that will stop time. It may be true, but it’s hard to say. I am definitely not the type of person who brags, but I don’t look my age at all. No one knows, and I don’t tell them. What I do tell them is all the fancy advertising and product testimonials can make some very expensive skin care lines seem inviting, but I’ve tried to stick with basic grocery store items and recipes to wash, exfoliate, pamper and moisturize my skin. And from what I’m told? I’m not doing too damn bad!

Being a skincare “mix master” does take time. You need to do a few things first:

  • Know your skin. Is your skin dry, oily, combination? Are your pores large? Do you have fine lines? If so, where? Is your skin tone uneven? Is your skin sensitive–especially to harsh chemicals, dyes and fragrances? What are you using on your skin now? Does it work? You should have an answer for ALL of these things. If you don’t? Look & touch then read & learn.
  • Know what natural ingredients do for your skin? Most people don’t know many of the benefits from certain items in each aisle of the market. Oh, and trust me when I say you can go down aisles and get just about everything you would need to make a simple, easy, inexpensive but targeted skin care routine. Just a little research is all you need to start.
  • Practice. Not every recipe has what you need. And some recipes have too much. The more you know your skin, the easier it will be to take a basic combination and tweak it just a bit to do exactly what you want it to do.

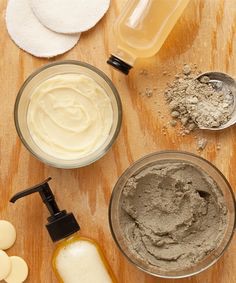
No matter what you are looking to do, there are a few things that you can purchase to keep on hand for when you want to make a skin care routine that will give you smooth, clean, soft, glowing skin. Head to toe. So if you are planning on making a skin care regimen that will give your skin what it needs and leaving out what it doesn’t–and still not feel guilty about a huge price tag–make sure you have these things to start:

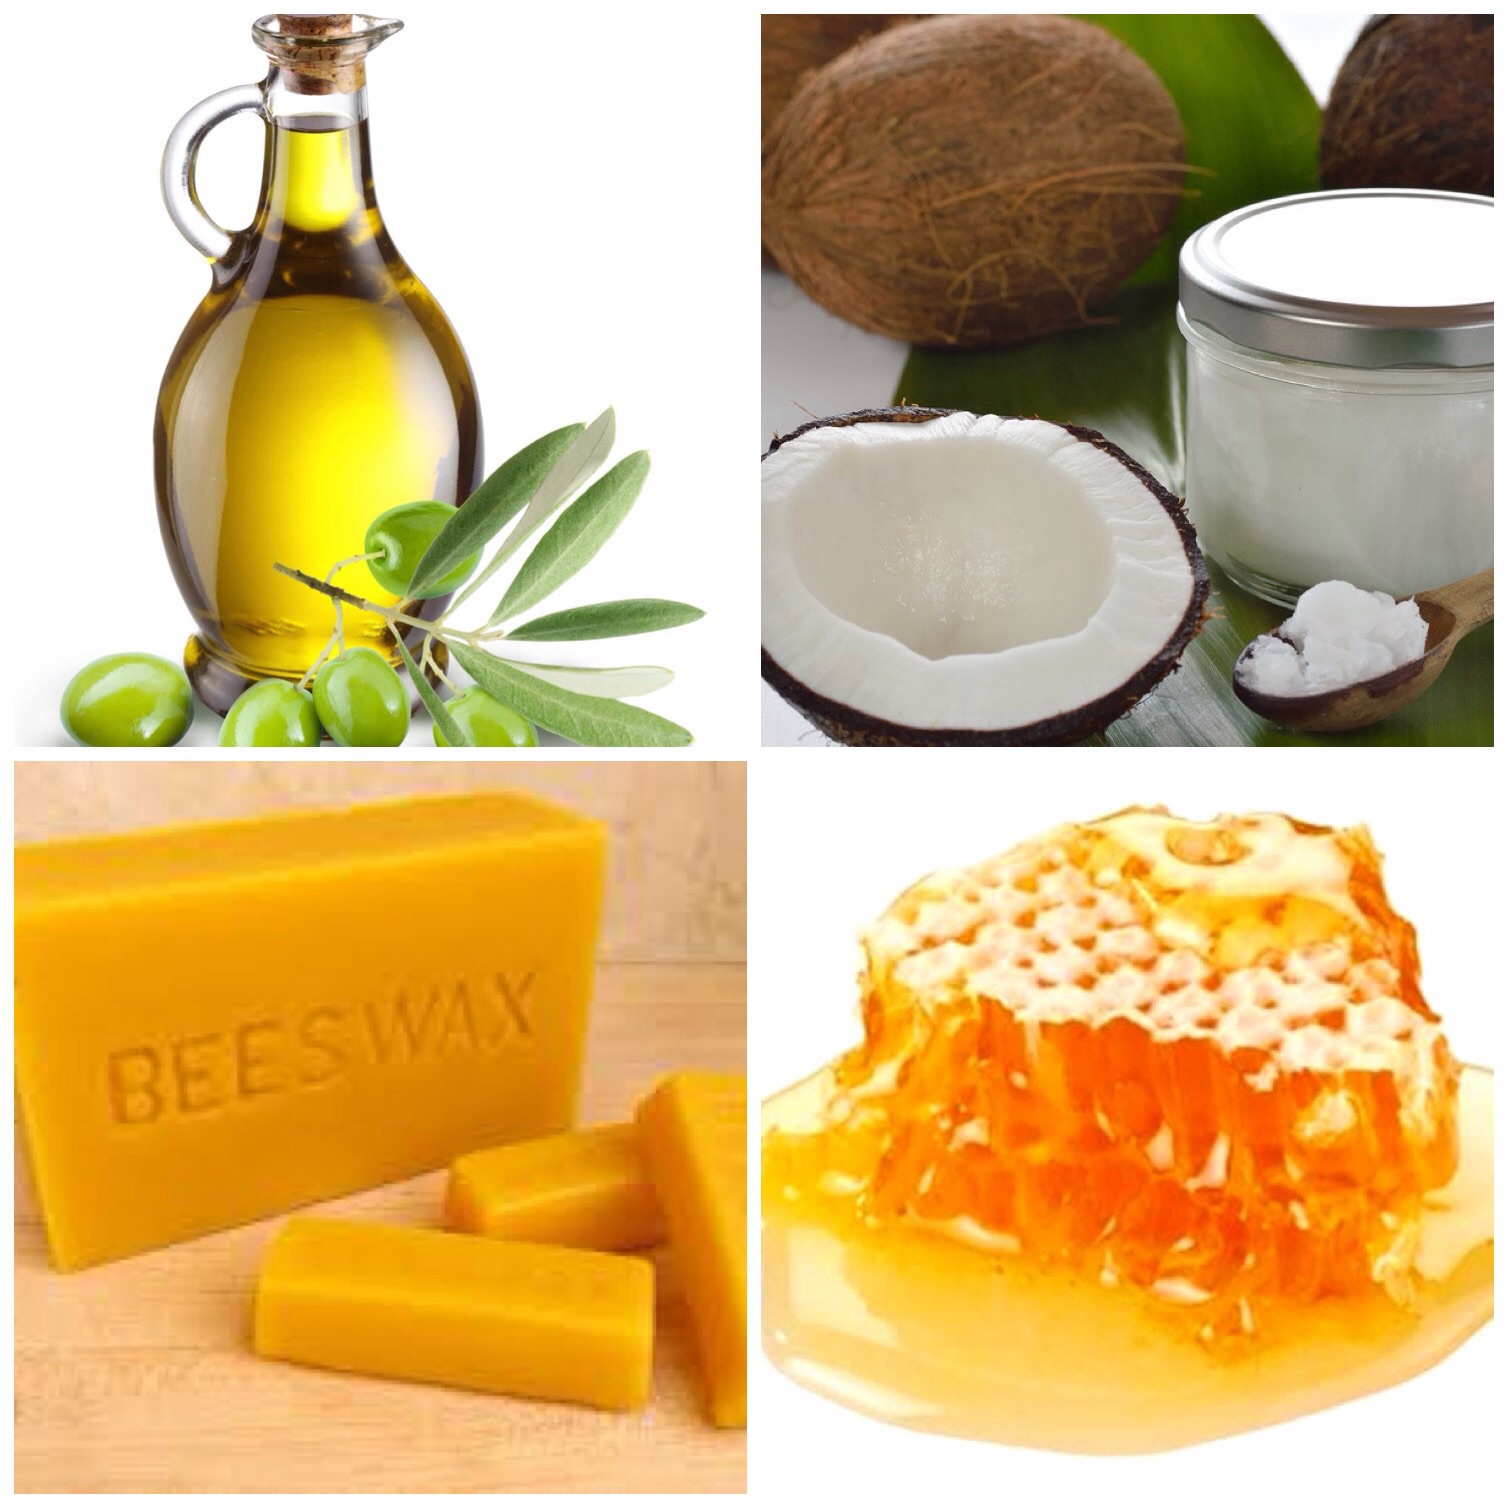
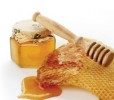
  1. Raw honey: Look it up–you will see that honey has been healing cuts and wounds before we were all born. You gotta love those bees! An amazing fact about honey too is that it never spoils. It may get old, thick & concentrated but it will always be good. When wrinkles occur, it happens because the skin is dry (with minor, almost invisible cracks). Honey heals the cracks naturally with its natural healing properties. It is also a great ingredient in facial and body cleansers. It removes dirt and makeup gently and locks in natural moisture. Raw is the best because it is in its most natural form. Raw local honey is the freshest. Check small local markets or produce stands for the best.
  2. Coffee (instant and used grounds): Everyone knows that people turn to coffee for a wake-you-up fix when you need a boost. We can thank the caffeine in coffee’s oils for that. Well, that caffeine can also be useful to give your face a boost in the morning as well. Mix in a bit of instant into your regular cleanser or as an added ingredient to your homemade face wash to stimulate your cells, encourage blood circulation and wake up your skin. If you have used coffee grounds from your morning pot left over (no flavors!), let them dry out on a paper towel and grind them down a bit finer to add to your regular body wash. This awakening scent will help exfoliate you from head to toe while the caffeine gets the blood pumping. A fab waker upper!
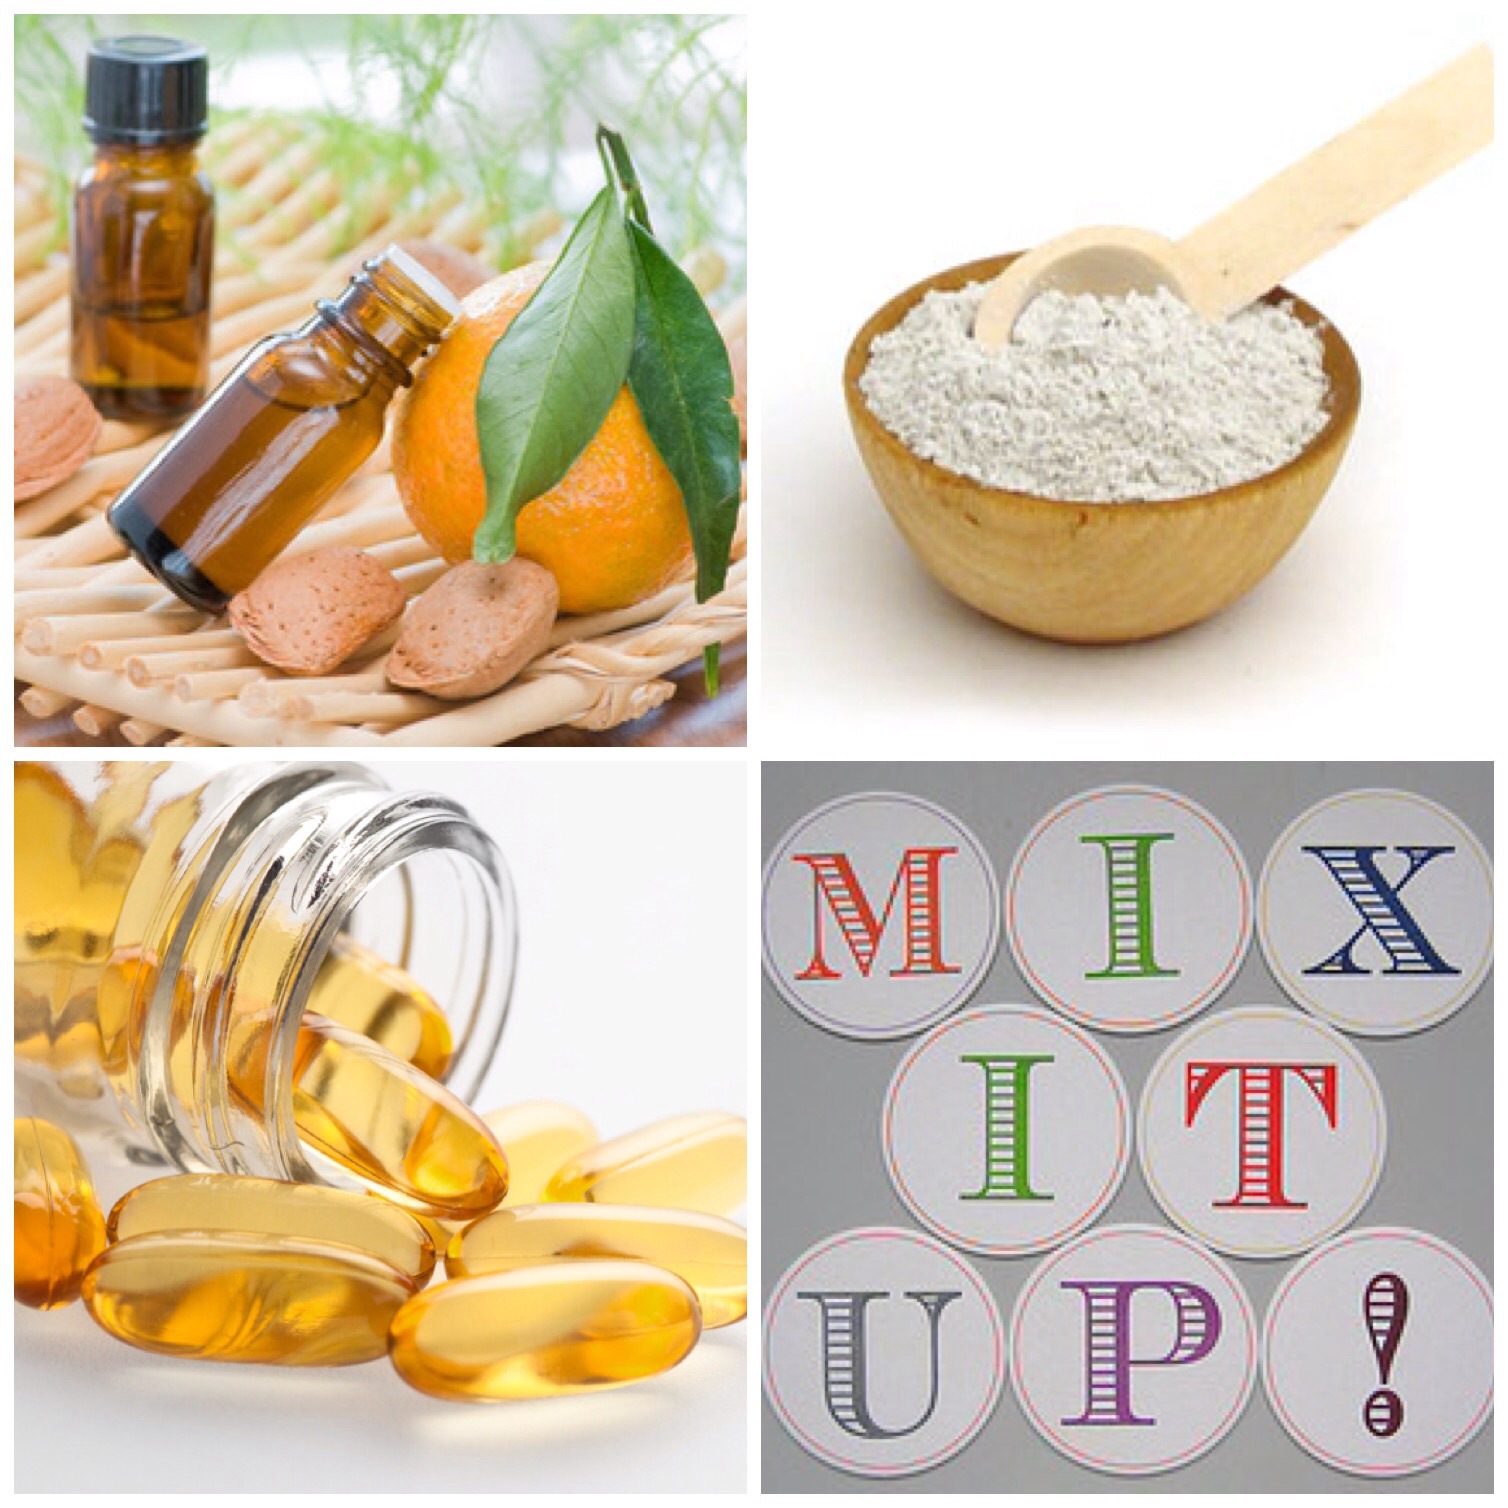
  3. Vitamin E Capsules: This oily little vitamin is great for so many things, but at the same time it needs to be used with care. Some people can have allergies to the other chemicals in Vitamin E, so it’s better to use a few drops as an additive in your regular products to give you extra moisture from the oil and block free radicals. Combining it with vitamin C can help that as will a fight sun damage. Vitamin E is also a must have for homemade lip balms, lip scrubs, and body creams.
  4. Unsweetened Lemonade Packets: An odd one, huh? Well it is. But the benefits are worth it. Sometime coating your finger in Vitamin E and dipping it into unsweetened lemonade will lighten up dark circles (go easy on the lemonade around the eyes, though.) Adding to you grand mixture of coconut oil, Shea butter, a bit of honey and a capsule or two of vitamin e will give you your all-over body moisture moisturizing & healing properties with a fresh scent.
  5. Granulated Sugar: Ah, another it’s that might be better on your face than in your beverages! The coarseness of the sugar works as a great exfoliator from head to toe. It’s a must have for lip scrubs mad with a bit of oil, and a bit of Shea butter. Honey is a plus too. In the shower, add a packet of coffee shop sugar to a squirt of your favorite body wash to tone your skin and regenerate cells. Does white sugar seem too harsh? Not a problem–use a light brown sugar instead! You will find it a great asset to use regular sugar to keep skin smooth and fresh.
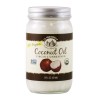
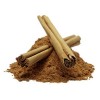
  6. Coconut Oil: Oh the oil that is changing the glamour industry. Coconut is an oil that melts as soon as I gets above body temperature. So keeping it in the fridge for long time use or in the bathroom when quickly needed is a must. Believe me when I say it is a blessing to all who want to look younger longer. Coconut oil can be used with a drop of peppermint oil to smooth & moisturize feet. It can be used straight out of the jar to remove eye makeup. It can be mixed with a little honey and some instant coffee pellets for a cleansing wake me up. And when whipped up with a little bit of honey, some Shea butter and a bit of citrus (see below) the fresh summer scent will freshen your body. In the fall/winter, replace the lemonade with cinnamon, cloves, a drop of orange extract or just a bit of pumpkin spice. Yummy!
  7. Heavy Cream: Not a common item, but I love it! This is one of my must haves for any face cleanser receive. The extra natural fat in heavy cream replenishes moisture to your skin naturally without chemicals, clogging pores, and added artificial ingredients. The sky is the limit on this. Blend with anything I’ve mentioned before. I like to was my face with heavy cream, honey, a touch of coffee, and a bit of extra fine oatmeal. Gentle, non abrasive and cleans my face gently leaving it soft and its out of my pantry.
  8. There are so many other ingredients out there that are perfect to help your skin. Check into other things like bananas & peaches (I use organic baby food–convenient and already processed!), coconut water, rose water, yogurt, cocoa powder, cinnamon, lemon juice–the options are endless. Just be a smart facial mixologist–read a lot, test everything, tweak the recipes when needed, and if its not right and doesn’t make your face feel and look the way you want…. no big deal. You’ll create your own 5 star “product”‘soon enough!!

    Advertisement

My skin has announced “It’s That Time Of Year”…

2 Apr

image
Let’s follow that “mix ’em up” theme again today, shall we?

imageEvery once in a while–usually springtime–my face gets “grumpy”. High-end and drugstore makeups make my face itch. Some eye shadows and mascaras can make my eyes burn and water. Some moisturizers and serums make my face irritated. But what’s worse? The face and eye creams that are supposed to keep me looking young actually causing meto break out, get puffy and make me look old. Sometimes it can get so bad that it can even require me to take an anti-inflammatory medicine to calm it down. Sad to say?…I’m used to it. It goes with my auto-immune diseases. The products that can help a “normal” person the most can cause flares with me the worst. Most of the time, simple irritations can be triggered by simple seasonal allergies–new grass, budding trees, wild flowers growing. Sometimes but rarely it can be a food. Too often, however, it’s because I’ve taken a chance on a new product only to find out I can’t use it for whatever ingredient or additive it contains. At that point, it’s hard to fight the test of time while I watch my skin loose its youthful luster. Like Grumpy Cat?… I say phooey.

imageSo what do I do when my skin gets “irritable”? Well, I go back to the basics. Way back when I could barely use anything commercial, I made my own cleansers and creams with 100% natural ingredients to help wash, moisturize and fight aging without additives, perfumes, dyes, harmful chemicals, or worse–the “what the hell is that?” ingredients. And I got good at it! I did a lot of research and trial batches to find what would work the best. Eventually, my skin would calm down and natural-type skin care products from a store were okay to use again. But even now, when I hit a skin ‘flare’ for whatever reason, daily necessities like washes, masks and moisturizers can be put together with ease from simple home ingredients I always keep handy to get me through this irritating phase.

imageWhen it came to long-term anti-aging products however, it was the one thing I never really thought too much about. I figured a good moisturizer would be enough, but now I’m seeing I need just a bit more to fight the signs time. So after A LOT of research and a little bit of tweaking, I have managed to create a great night cream recipe that is easy to prepare and can sit next to my bedside or bathroom counter for a long time. Nothing in it can “spoil”. And seeing how little I use? I’m sure my 10 gram jar will last a long, long time. I will give you my recipe and why each ingredient is important and you can fight the test of time naturally too. If you are someone who is a little (or a lot) questionable about the chemicals and additives in your anti-aging creams, this is the thing for you. Let nature keep you young! Here’s what I’ve created:

SASSY AUBURN’S AGE-FIGHTING NIGHT CREAM
2 tbsp extra virgin olive oil
1 1/2 tsp organic virgin coconut oil
1 tsp beeswax
1 drop peppermint oil
1 drop grapefruit oil
1 medium sized drop of raw honey
1/3 tsp Bentonite Clay
2 capsules Vitamin E

image

Purposes:
Extra Virgin Oil contains anti-oxidants which protects the skin from premature aging. People have been using for centuries. It also restores the skin’s smooth surface and prevents free-radical damage to the skin. Oh, and it’s easy to find anywhere!!

Organic Virgin Coconut Oil keeps the natural moisture in the skin with its fatty acids. It also contains Capricorn/Caprylic/Lauric acids. These three fatty acids have strong disinfectant and antimicrobial properties to keep the skin fresh and healthy, fighting off ‘nasties’ in the air.

Beeswax…oh those glorious bees! Because of those hard workers, beeswax helps our skin because it’s moisturizing, softening, and contains Vitamin A which is necessary to lock in your skin’s natural moisture. Beeswax is also one of the oldest healers known to man, and the wax can help repair small cuts and tears in the surface of the skin where fine lines can begin.

Peppermint oil is a natural skin soother and calmer. Grapefruit oil contains Vitamin C which helps brighten & nourish the skin. Plus they both smell naturally great together.

Raw honey has been known for over hundreds of years to heal the nastiest of cuts and wounds. Too much is a sticky mess, but just a good sized drop in the mixture helps to target little surface tears on the skin that can lead to deeper, darker wrinkles and blemishes.

Bentonite Clay has been known in history as the “healing clay.” The clay that actually comes from volcanic ash, actually expels toxins we take into our body or, in this case, pick up on our face. These can be residues of cleaning solutions, paint, unpurified water, etc. A mixture containing Bentonite Clay powder can rid these impurities from the skin’s surface–especially the face–where age can show the fastest. In addition to taking out the bad, it can also put in Bentonite’s good minerals. This include potassium, protein, calcium and so many others! It’s not easy to find, but many private herbalists can get it for you (it is on EBay too).

Vitamin E is kind of self explanatory. Vitamin E, a substance found naturally in many foods, carries tremendous benefits for skin cells. Through its antioxidant properties, topical vitamin E creams help decrease the roughness of skin, the depth of wrinkles, and the length of facial lines. Although many more studies must be done, some recent research shows that vitamin E may reduce the risk of UV-induced skin cancer as well.

image
Okay, so now you’ve got the ingredients, the reasons you need them, and the knowledge that this is a healthy, natural nigh cream using basic things that have been used for ages to keep skin looking great. Ready to make a batch that will last you a LONG time without costing an arm & a leg? Let’s do this:


1) Shave approximately 1 tsp of beeswax off a cosmetic bar (available on a Ebay for cheap) into a small glass microwaveable bowl. (If you can, try to find honey in a comb-a local farm stand may have some-and chew up a large scoop. Don’t eat the wax–just chew it like gum. Ingesting natural raw honey in this form will help YOU fight against diseases and boost your immune system. You can then add the remaining wax pieces equal to 1 tsp to the mixture, just break them up into small pieces!)
2) Add the wax along with the olive oil, coconut oil, peppermint oil & grapefruit oil in the microwave on high for 30 seconds. Take out (Careful–HOT!!), stir. If wax isn’t melted, go another 30 seconds.
3) Next add the Bentonite Clay. If it turns into solid droplets in the mixture and won’t blend, put it back in the microwave and cook on high another 30 seconds. Carefully remove again (VERY HOT WAX!!) and blend the clay with a fork till its dissolved. Your cream will be a slightly cloudy yellowish white.
4) Add the Vitamin E capsules by puncturing them and squeezing them into the mixture before it begins to settle & thicken. Mix with the fork again. Throw out the empty Vitamin E “shells”.
5) Pour complete mixture into a 10 gram cosmetic jar or even a 4 oz. empty canning jelly jar. An empty, clean glass baby food jar works great too. I find glass is best to keep it fresh.
6) Put in fridge till it solidifies.
Afterwards, you can put the mixture in the bathroom or next to your bed for your nighttime skin routine. Nothing in it can spoil. It will last about a year.

That’s it. It might get hard with the wax (less creamy), but it will dissolve to the temperature of your hand. It’s easy to make with simple ingredients for pennies with the same results you might get from an $85 tiny jar of cream and unknown chemicals at the local department store. If it’s heathy enough to eat, I’m guessing it’s healthy enough to put on your face. Stay young and healthy without chemical irritants with an easy to make cream that keeps you looking & feeling like a million but only cost you less than a bottled water. And you don’t have to worry about funky ingredients you can’t pronounce. It’s au naturale. Perfectly pure!

Any questions or feedback?…. I want to hear from you!!

This non-irritating, natural, anti-oxidant skin care will make and keep you’re skin looking young and healthy, better than high-end, high cost retail jars. So, let’s go all Walter White in our private domicile, don’t be harassed, and cook up some fab anti-aging night cream! Good luck & have fun!
image

Sometimes You Gotta Mix ‘Em Up….

24 Mar

imageIn the glamour world, very few things stand alone. Oh sure, you can have that über gorgeous red carpet dress that turns the heads of every status photographer on the runway, but the fact remains that the hair, makeup, jewels and shoes all play a part in that outfit being a front page headline.

That simple fact can also play a part in everyday looks for anyone. Whether you are a 9-5 office worker, a stay-at-home mom, an ever-scouting fad writer or an out there/have-your-own-style tattoo shop manager, layering fashions, accessories, skin care ingredients and makeup items can move a simple daytime look into the WOW! category with a couple of easy steps.

Here are a few to get you started. Following the bouncing ball:

image**Skin Care**-Washing, treating and moisturizing are, nowadays, the bare necessities. If you AT LEAST do that? You’ll hold your ground. But why not combine a few skin-loving ingredients to treat your face to an experience that will multitask with just a few natural, easy to find things. Because my face tends to be a bit dry in the winter, I tend to make my own cleanser/masks to get moisture and anti-aging properties from natural ingredients for the best results. It’s actually simple…

1. Combine 2 tbsp of a mashed overripe banana, 1 tsp raw honey (local is best), 1 tsp heavy cream, 1/2 tsp instant coffee & 1/4 tsp white sugar. (This may sound like a lot, but think ahead: you can freeze extra overripe bananas in the freezer, buy the instant coffee once to use in other things as well, and substitute powdered milk for heavy cream for longer shelf life.)

2. Mix all your ingredients EXCEPT the sugar till the consistency is a bit thick and the coffee has dissolved. Then add the sugar last.

3. Begin to rub it onto your face in small, circular motions. Go over it a few times, adding a bit more each time.

4. After about 5-10 minutes, wash off with warm water & a gentle cleanser (like Aveeno’s Foaming Face Wash)

5. Pat dry.

Whala! Instant face treatment with a combo of fresh ingredients. Your skin is clean, moist, soft and treated. Easy mixing, right? Now, let’s think about what you just did: *Bananas naturally cleanses while hydrating & adding anti-aging vitamins into your skin; *Raw honey is a natural healer and will help heal fines lines due to small skin cracks and stretching; *Heavy cream is loaded with moisturizers and antibodies to fight infection and environmental skin damage; *Instant coffee has just enough caffeine to constrict blood vessels, even your skin tone and awaken tired skin; *White sugar is a gentle exfoliant that will remove dead skin cells and allow the other ingredients to work on the next active layer.

Kind of all makes sense, huh? It’s not a lot of work and if you refrigerate the leftovers you can use what is left daily for up to a week. There are so many ingredients you can add or substitute if you want other skin problems targeted. Tip: Don’t like the way the bananas turn brown in the fridge? Use Stage 1 baby food bananas. They last longer, don’t turn brown and the little bit of lemon juice that is in them helps even out your skin tone too. Baby peaches are good to soften skin. Oatmeal powder can reduce pore size. Yogurt has natural bacteria to help fight acne and breakouts. (Click here for other ingredients and recipes that can help your skin type.)

image**Mascara**-Any YouTube video will tell you that you should wear between 8-10 coats of mascara for drop dead looking eyes. Ummmm… no offense? I don’t have time for that. And it never looks like the pictures anyways. So what’s my layering trick for great, long lashes? It’s kind of simple and doesn’t need a lot stuff. But you will need 3 different mascaras:

1. Get a good mascara that has a great comb wand. This will enable you to coat each lash for length and keep them separated. Plus you can get the little innie lashes with a pointed brush. My go to brand? Benefit Cosmetics “They’re Real!” Mascara. (Sephora, $24)

2. Next, when mascara is completely dry, curl them with a eyelash curler. None specifically, just make sure you are comfortable using it and it doesn’t pinch your eyelid or pull out any lashes.

3. Another coat of mascara. This time use one that lengthens and keeps the separated but begins to add volume. Again, a good wand is important. A comb is good again but can be one whose “bristles” are tighter together. I really like Buxom Lash Mascara. It keeps them fanned with a bit of thickness. (Sephora, $19)

4. Last step? One coat of a thick foofy brushed waterproof mascara. Lock in that look and keep your butterfly eyes looking smudge-proof all day. There are always new ones on the market and I try them before mine dry out and get old, but I’ve always had great success with Lancôme’s Waterproof Hypnose Drama Mascara.

Don’t get scared away by my suggestions of department store brands. I have had great success as well with drugstore brands such as Rimmel’s Scandal’Eyes Show Off Mascara, Lash Sensational Mascara from Maybelline, and L’Oreal Power Voluminous 24hr Mascara. Each is easy on the wallet but still layer-able to get the look you want.

image**Lips**-Maintaining a good, even lip tone with color, gloss, or both will take a little getting used to. The fact is, I don’t have time all day to constantly reapply an entire color routine on my lips. And between chatting all day and drinking coffee, it stays everywhere but on my lips. It has taken some time to get a good routine down, to maintain a lip look that will only need a touch up now and then. But you’ve got to trust me to play with this till you get the look/color you want. Ready?:

1. Exfoliate your lips with 2-3 drops of olive oil and a pinch of white sugar. Dab it on your lips then roll them back and forth so the oil penetrates and the sugar takes off any dry skin. Wipe off excess sugar with a tissue and blot excess oil.

2. Outline your lips with a neutral lip pencil. A great find is Rimmel 1000 Kisses Lasting Finish Pencil Lip Liner in Nude or Avon’s Glimmersticks Lip Liners in Simply Spice or Pink Cashmere.

3. Next time you are shopping, hunt and find a packet of unsweetened Pink Lemonade Kool-Aid and/or Cherry Kool-Aid (if you find other flavors, grab them. They are pennies and can be combined for great shades.) Using a Q-tip, dot a little bit of the powders on your lips, combining to achieve the color you want. If you have to add a drop of water to the other end of the Q-tip to help blend, that’s fine. Just add evenly so you don’t have one lip one color, one lip another. When done, let sit & dry for about 5 min. (If you prefer to just use one flavor, that’s fine too.)

4. Using a lip brush, apply a small amount of a good balm or gloss to keep lips soft. I prefer a balm, as glosses can get oily and transfer more easily giving your color less stay power. My fave right now? Chapstick’s Cake Batter formula. Yum! If you like a bit of frost to your shade, Nivea has a “Kiss of Shimmer Radiant Lip Care” which tops off for a nice, long-lasting sexy frosty shade while keeping lips soft & smooth.

5. Carry a gloss with you that matches today’s Kool-Aid shade in case of early fading or blotchiness or for an extra hint of colored shine.

If a stain isn’t your thing, try to find a ONE STEP lipstick with mega-stay power to keep your lips bright & soft. It won’t last as long but will buy you time in between lip breaks. A good find for me? New York Color Expert Last Lipstick. I find it lasts longer than any tube lipstick I own and the price is a steal.

So there you have it. Layering to get the look you love and the stopping the clock of aging. (Okay, not really but we can sure try to slow it down!) Good luck with these suggestions and please–PLEASE!–share if you have any of your own!

Next time? I think we will tackle eye liners, sweaters and….let me think on it.

DIY Night Cream…That Works!

25 Nov

SleepingA little while back, I saw a do-it-yourself recipe for a night cream that seemed easy to make with ingredients that I know had great anti-aging properties. It has been a while since I’ve made any of my own natural skin care, but after researching some of the new ingredients and knowing the nature of the familiar ones, I thought I would give this one a shot, especially with the change in seasons.

After making it about two weeks ago, and using it nightly since, I have definitely noticed a difference in my skin. When I get up in the morning, I thoroughly wash my face (exfoliating twice a week) and can notice softer skin, smoother complexion, less fine lines, and a nice even glow. Very good. Very good indeed.

Of course, me being me, I had to tweak the recipe just a bit to make it the way I like it, but I had my reasons which I’ll explain. But so far, this inexpensive, totally natural night cream is my go-to savior as the temps start to drop and my skin gets drier.

So, ready for me to share? Get a pen because a few things you may have to find…and I’ll tell you where.

Sassy’s Super Night Cream

2 tsp. beeswaxBeeswax is a skin protectant, healer, softener and fights against bad bacterias that can set into dry or chapped skin causing irritation or inflammation.
1 1/2 tsp. coconut oilAgain, coconut oil can fight against dry skin by improving the moisture and lipid content of the skin.
2 tbs. almond oilA staple in my home, almond oil has many positive qualities to benefit the skin from head to toe. This is a true gem that helps balance the PH of the skin, removes dark circles around the eyes, and reduces wrinkles.
1 tsp. grapeseed oilOh, my favorite oil! Its benefits are endless–who knew? It’s great in a night cream because its properties help reduce skin inflammation, tightens skin, moisturizes and fights aging.
1/4 cup aloe vera gelLike many of the other ingredients, aloe helps fight acne, moisturizes and fights aging. What’s great about this specific ingredient is it is not oily and is quickly absorbed to make the night cream light and less greasy.
1 tsp. raw honeyHoney does a lot of what the other products do, but in a raw, fresh way. In addition to the general properties of the other ingredients, honey will also open your pores (making them easy to unclog with your morning wash) and helps give your skin a nice glow.
2/3 tsp. bentonite clayYup, this one is probably new to you. It was for me! But after researching, I find this is the most important ingredient. This clay actually comes from volcanic ash, packed with beneficial minerals while binding to removing toxins. According to Mountain Rose Herbs: “Bentonite, also referred to as Montmorillonite, is one of the most effective and powerful healing clays. A good quality Bentonite should be a grey/cream color…anything bordering “pure white” is suspect. It has a very fine, velveteen feel and is odorless and non-staining.” The clay can actually produce an electrical charge so when working with it, PLASTIC OR WOODEN UTENSILS CAN ONLY BE USED to do the mixing.
1/4 tsp Unsweetened Hi-C Lemonade PowderThis is a great add to give the cream a gentle scent but also adds Vitamin C and Citric Acid which helps to reduce pore size, brighten the skin and speed cell turnover to keep skin looking young.

DIRECTIONS–FOLLOW CLOSE!:
In a small, microwave save plastic bowel (with cover), add the first 3 ingredients and microwave on medium for 1 minute on medium. Remove carefully and stir with a wooden stick or plastic spoon. Repeat for 30 seconds, stirring about a minute in between till wax is melted. Add the aloe gel, grapeseed oil, lemonade & honey into the melted mix. Stir gently and repeat till the cream is completely blended, smooth and is beginning to thicken. While it is still soft, add the bentonite clay. REMEMBER–PLASTIC BOWLS AND SPOONS ONLY! NOTHING METAL!!! Once smooth with no lumps, cover and put in refrigerator for about 2 hours. The steam in the container will add natural moisturizer with the cream. Take out for about an hour before use. One it is out, it can stay at room temperature.

Most of the ingredients you can get either in the market or on eBay. Here is a list on where I found these items:

Almond Oil, Grapeseed Oil, Coconut Oil can all be found in the baking aisle of a regular supermarket usually. You might want to try a higher-end market that specializes in organic products. The Hi-C Unsweetened Lemonade packet can be found in any supermarket drink-mix aisle.

Beeswax can be found on different EBay stores. I get mine from EBay seller “paypalsale”. You can buy just one ounce which is more than enough and shipping is free. Find the link to their listing –> here

Pure Aloe Vera Gel can also be found on EBay. I got mine from EBay seller “bodygrin”. You can find a listing for the aloe gel with free shipping –> here

Bentonite clay can be sold with additives so it’s important to find a pure product. I really like the one I got from EBay seller “hedys-haven”. You can find a link to their clay –> here

This recipe will give you a decent sized container of night cream that can be kept out next to the bed or on your bathroom counter. The “cream” can be a little waxy with the amount of beeswax used, but I like the health benefits that the beeswax contains so I add a bit more. Even waxy, the cream will melt at skin temperature, so it will go on thin when warmed between the fingers. Make sure you wash your face in the morning because the night cream will turn the cells over while you sleep and you will want to wash the “old” ones away in the morning, leaving your face feeling soft and looking bright & young!

Have fun making yourself a natural, healthy night cream that does what you need and more… without unneeded chemicals, additives or the added price of retail advertising. Not to mention, with the amount you’ll get out of one batch and how little you will use? You probably will have enough to keep you looking young for pennies for a long, long time!

A Trick Of The Trade…

3 Aug

image
Over the years, I have been asked on several occasions to try and review different cosmetics. One of the big items I get many samples of is loose mineral eyeshadow. I put any samples I get into 5 gm sifter jars and arrange them in my makeup drawer usually from light to dark. I would easily say I have over 100 samples of different colors. I’m not proud of that. I will probably have enough to last me till I get to the nursing home someday, and then will have enough to trade for chocolate pudding on weekends.

Although I have tons of different colors of loose mineral eyeshadows, I’m sad to say I use very little of them. It’s not that I don’t like them. In fact I love them! They are natural, highly pigmented, long lasting shades that take very little to achieve a desired look. But here is the problem: they are messy. If I don’t make a mess with the powder falling off the brush, I then have to fight the mess of shadow fallout on my face and cheeks. That part is annoying. I’ve always tried to follow the rule: do your eye makeup first, but even then, some mineral shadow falls out and can’t be blended naturally into the skin when it comes time to prepare your face. Then a face cleanser wipe is needed to clean the entire face–minus the eyes–and the face routine must be redone. Annoying. Hassle. Bah.

During my recent Twitter surf, I might have found the answer to my loose mineral eyeshadow problems. I’d love to give credit to the original poster but it’s been around Twitterverse so long now, I’ve lost track of how it was mapped! So, I decided to just throw up this “How To” blog post so if you are like me, you can get a solid grip on these loose high pigment shadows without your bathroom counter looking looking like a powdery rainbow explosion.

What you will need:

  • Loose powder mineral eyeshadows in jars
  • Q-tips
  • Rubbing alcohol (70% Isopropyl Rubbing Alcohol is the best)
  • Small piece of Saran Wrap
  • Pressing pans & compacts (if desired)

image1. Take your loose mineral eye shadow and remove the sifter if there is one. Gently tap the container on a counter or table so all the shadow is even at the bottom. If you want to add or mix colors, do it now. Make sure after you add any new pigments, you replace the cap, shake to mix & tap to make it even again.

image2. Take the cotton off one end of the q-tip so all you have is the stick. CAREFULLY add a couple of drops of alcohol to the powder. You can do this with an eye dropper or by dunking the cotton end of the q-tip in the alcohol and squeezing the tip with your fingers so the drops go in the container.

image3. Mix the powder shadow/alcohol mixture with the stick end of the q-tip. If it’s very dry, thick or clumpy, add one drop of alcohol at a time till it becomes a thick but still smooth paste.

image4. If you want to put it in a shadow pan, use the q-tip to scrape it in. If you want to keep it in the jar, smooth it out as much as possible. Take the small piece of Saran Wrap and lay it over the shadow. Take a quarter (for a pan) or a bottom of a small tube, like a lipstick tube (for a jar) and press down a couple of times to pack it. Let it set with the weight on it for a minute or two.

image5. Remove the plastic wrap and check to see if it is packed and solid. If it’s still loose or clumpy, add another drop of alcohol and pack again. If it’s too watery, let the alcohol evaporate for 5-10 minutes then pack again to see if it hardens. (You could also add a bit more powder shadow to thicken it up a bit, leave the top off for 5-10 min. then repack again.). If it is a perfect solid shadow, then you did it!

image6. Leave the open jar or pan out in the air for 15-30 min to let any remaining alcohol “burn off”. Then take the finish product and either cap it if it’s in a jar or put the pan in a compact. Done, solid, no more mess! Your “new” solid eyeshadow is ready to use! Go play makeup!,

**NOTE** – Make sure the shadow is completely dry and packed before you use it. If it is the slightest bit creamy or “wet”, that means the alcohol hasn’t evaporated completely or you used too much and putting it near your eyes can cause burning and irritation. If you feel this happening, rinse your eye out with water and wait a while longer for the alcohol to evaporate. You can also add a bit more pigment powder in a similar shade to help thicken it and quicken the process.

The one thing I love about doing this is that I can blend various colors together to get unique shades. For example, tonight I combined a very light aqua blue, a bit of very dark blue sparkle and a bit of cream frost for a smoky peacock turquoise. SOOO pretty. My next challenge will be a deep maroon purple!

If you are looking for reasonably priced pans and pallets, the best place I’ve found is Stars Makeup Haven. They have all kinds of empty containers. Since my samples tend to be in small quantities, I’m leaving them in their 5 gm jars and just “solidifying” my favorites.

Enjoy mixing and creating! This is a great way to keep your favorite loose shadows ‘tight’ without a powdery mess in your drawers, purses, cases or bags! Try it and enjoy a new way to use natural mineral eyeshadows in a controlled, solid way!

*POOF*–Quick Fall Lip Balm!

25 Oct

image
Okay no huge, long, wordy post. This is direct and to-the-point so follow along and don’t fall behind. I’m going to quickly tell you how to make a simple, moisturizing lip balm to keep you pucker happy as the seasons change. Ready?

You will need the following items:

* 1/2 tsp. raw honey STILL IN THE WAX comb (see photo)
* 1/2 tsp. organic cold pressed coconut oil
* 1/2 tsp. raw honey WAX ONLY. (You can get this by scooping out 1 teaspoon of honey from the comb, eat it, and continue to chew it till all that is left is the wax.) (see photo)
* Sprinkle of organic cinnamon

Honey
Coconut oil
Cinnamon


If you read my posts on a regular basis, you should have everything you need already because they are all items that are in my bathroom or kitchen right now. If you WANT to buy them, feel free… but don’t just use them for this balm. They are a few of nature’s precious commodities that can be used in soooo many beauty products as well as in cooking & baking.

Now, take a shot glass and scoop out the waxed honey–scrape it in. Scoop out the coconut out–scrape it in. Drop in the chewed piece of wax (flatten it out as best you can)–add that in. Add the dash of cinnamon. Put the shot glass in the microwave on MEDIUM for 15 seconds. Check it. See if anything is melting/bubbling. If yes, STOP! If not, put it in again for 10 seconds more. Now you should see the coconut oil has melted and the honey is bubbling. BE CAREFUL BECAUSE THE GLASS IS HOT AS HELL! Remove with a hotmit and set on counter. With a Popsicle stick, a narrow butter knife or tiny spoon, begin stirring.(Don’t touch the glass!!!) It should blend easily and begin firming up the more you stir. Make sure it is completely blended and lump free.

Before it gets too firm, scrape all contents into a CLEAN left over eye shadow container, tiny makeup jar or even an empty sample holder that has been thoroughly cleaned & dried. Put the balm in the container, scooping it in after if has cooled a bit. Smooth out the top and refrigerate for an hour.

My balm

Bam. Done. Awesome, easy balm! Once you get it mastered, you’ll be able to put them in swivel Chapstick-like tubes for easier application and storage. Sure, you could get funky with flavors, but for fall, stick with cinnamon. The balm works fab, lasts for hours & hours and well, hell….you made it. Au Naturale! All the ingredients are helpful for protecting you from the nasty germs flying around since all are anti-viral and anti-bacterial.

See? Easy peasy, puddin’ and pie. A nice, tasty, easy DIY lip balm for fall that you can be proud to make & call your own!!

Anim kiss
Questions? Feel free to email me and I’ll see if I can help!